Month: August 2025

7 Drawing Tips for Beginners

sketching with art

A child's first scribbling is something which it tries to express if you give a pencil in his hand. Drawing is relatively very simple and an easy skill and is something with which you can have great fun. It is also relatively not a very expensive hobby and can start with paper and a pencil. It can go on till acquiring costly pen and tablets - a computer hardware through which you can draw on your computer. It is very costly; however the precision for perfection is very high.

Unlike earlier days, getting information on drawing and sketching is very easy and inexpensive. You can search information on Google and get various sites which teach drawing. Also, nowadays this art form is liked by many youngsters. Like all other art forms, with constant and systematic practice one can become a great artist.

Listed below are few drawing tips which can help anyone improve their skill and become an artist. Reading and practicing these in your daily routine will improve your skill.

1. If you are drawing and you are right handed person, ensure that the light is from your left side. This will prevent your hand shadow falling on your paper.

2. First step when you practice drawing - you should practice drawing line, straight line, curved line, scribbled lines, and your hand should obey the command of your thoughts and visions. You should control your hand and you should be able to bring out what you want.

3. You should further develop drawing circles, oval shapes, crossed lines and bold and thick lines. Just like how a baby develops from crawling stage to walking stage, your art should also develop step by step.

4. These lines and curves are like pillars to a building. The foundation should be strong enough to have a good building; similarly these initial small lines and curves will go a long way in your career. You should also start controlling the stress on your pencil. You should be able to bring the correct darkness and thickness in the lines what you draw.

5. Initially you will not be able to draw a circle or an oval shape correctly, nevertheless don't get discouraged. You should practice and practice until you get perfection. You should also keep all your drawings carefully from the start to know how you are improving. You could also date your sketches and preserve it for the future.

6. You should concentrate in the area where you feel you are weak. If you are not able to shade properly then learn more to do that. You can try out your own style of shading. Build your own individuality, never copy from another artist.

7. Last but not the least, use good quality materials. 4B and 6B pencils and good chart paper or note book with good quality paper should be sufficient to start with. Quality definitely matters hence never compromise on quality.

Categories: Art Tags: Tags: , , , , ,

3D Animation

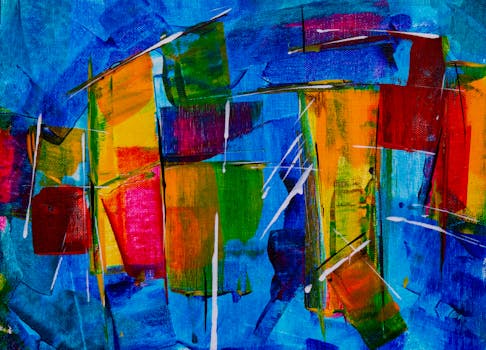
Colorful abstract expressionism painting with vivid brush strokes on canvas.

3D animation deals with electronically produced computer-generated 3D imagery used in motion graphics and digital special effects. In this case, the animator creates a design style or concept that tries to visually interpret and convey the required information using both new and traditional animation techniques.

The 3D animator will have to be well-acquainted with 3D animation applications and software, film and video production techniques, production processes, digital special effects, art and design movements and methodology, typography, styles of performance and dramatization, film and broadcast genres, technical scripting, health and safety regulations for the film and broadcast industry, and an understanding of budgeting and scheduling processes.

The job of the 3D animator is to design and realize original concepts, character and content creation. The animator, therefore, is responsible for devising and communicating creative ideas and accurate technical information. They have to provide the client with detailed estimates of costs, and work within the budget and schedule.

Each assignment will have different demands. So it is imperative that the animator should have a good knowledge and experience of animation software and broadcast processes, as well as a broad knowledge of technical scripting and digital technology used in broadcasting. The designer must be able to respond with innovative concepts and practical solutions for each assignment. The assignments may be of any kind, from designing a spinning top to re-creating mythical weapons.

To succeed in 3D animation, one must have a thorough understanding of computer-generated processes and applications to be able to achieve creative responses to design briefs within the restrictions of budget and deadline. He/she will be required to possess a passion for design, good communication skills and a good understanding of broadcast, special effects and character animation. Last but not least, he or she must enjoy working as a team member under pressure.

In addition to being able to demonstrate high standards of computer-generated imagery and animation techniques you will need to have a good knowledge of art and design movements and imagery, creative problem solving and innovation, and the understanding of how to deliver design concepts and processes.

Categories: Art Tags: Tags: , ,

Title: 3 Steps to Picking out Your Dream Paint.

Moving into a new house can be quite an experience. You are totally in a new zone, surrounded by new ceilings and floors near stairs in an entire new layout. You want your home to look the best, so it's important to pick out the right kind of paint. Of course, in a single article, we can't show you absolutely everything that you need to know about moving into your new house, but we are going to try to give you some good tips on picking out a new house quality house paint.

1. Match it. By new house paint is arty difficult as it is in, and you definitely don't want to paint your house a second time. Make sure whatever kind of house paint that you buy matches up with your existing paint. Maybe take a picture or find out exactly what kind of paint you have in your house right now so that when you go to the hardware store, you can show them exactly what you need.

2. Buy high-quality paint. Take a look around at the different types of paint that are available for you to buy in the store. You will quickly notice that paint varies in quality drastically and you generally get way you pay for. Granted, you have to make sure that you're not getting ripped off and you really are getting a good deal, but if you are serious about making money on your house, try to buy the best type of paint that you can afford.

3. Ask a professional. It's okay if you don't know everything about home remodeling. Some people do it for a living. Builders, contractors, subcontractors and other home decorators might be able to give you some words of wisdom and help that you might not be able to get otherwise. Don't be afraid to ask. Just ask them for a little help and you might be able to save yourself some time and headaches.

Of course, there's a lot more to say about house paint. We can't have put everything in one article. Visit our site to learn all about house paint today.

Categories: Art Tags: Tags: , , , ,

Make Some Art Work Today

When decorating a home or office, many people turn to the most popular and expensive stores to find pieces of art work to add to their space. And while this is a great way to decorate and to support your local art industry, it can be costly and make your home or office look just like everyone elses. A solution: make some of your own art work to display proudly in the places your love.

Making your own art work might sound daunting or unrealistic, but it doesn't have to. It can be much easier and more fun than you think. One of the best things about creating your own art work is that it gives you endless options for decorating uniquely. Think about it: if you decorate your home or office using just what you find in stores it can be pretty hard to create a unique space or to have a finished product that is really you. Making your own art work solves those problems. Your art work allows you to make pieces that fit exactly into the plans and dreams you have for your home or office.

Consider the home or office that you are decorating. Take time to dream about the possibilities and keep a list of what things you like and of what you hope your space will turn out to be like. Consider how a few well-made pieces of art work could add to the uniqueness and beauty of your space. Would a painting of a beach scene fit perfectly into your living room? Would a piece of pottery adorn your bookshelf in the perfect way? Don't let your lack of artistic abilities keep your mind from dreaming. At this point, consider all possibilities and leave worrying about the 'how' for later.

Gather ideas for your art work from as many sources as you can. Look in decorating magazines, in store catalogs, online, or even in the homes or offices of your friends. Keep your eyes peeled for ideas no matter where you are! The perfect piece of art work for your space could be similar to something you see with a few simple modifications.

Once you have a few ideas about art work that could make your space beautifully unique for you, then begin the process of figuring out how you can make your art work. Perhaps it will be as easy as visiting a local art supply store to gather the right materials, or perhaps you will need to enroll in an art class or two. Whatever it takes, stick with it. Creating unique art work for your home or office will be worth it no matter what. Friends and family will marvel at the beauty of your space and at how perfectly it fits you.

Categories: Art Tags: Tags: , , ,

Learning to Draw? You’re Gonna Need a Pencil

No Comments

If you're going to be doing any pencil drawing you're going to need a pencil. I know, I know, thank you captain obvious.... But, in this article I want to talk about some of the different options available.

Here are some of the options:
Mechanical Pencils, Lead Holders, Woodless Graphite, And ofcourse traditional wooden pencils

Mechanical Pencils: You're probably familiar with these. They're the ones that hold the lead (graphite actually) inside and when you push on the eraser more lead comes out. What you may not know is that, like traditional wooden pencils, the leads are available in various degrees of hardness which can be used to achieve lighter or darker tones as needed. We'll talk more about that later.

Lead Holders: These are somewhat similar to mechanical pencils in that you can use various leads with them. But rather than push a button to release more lead, these pencils actually have sort of a claw that grabs onto and holds the lead. Hence the term "lead holder".

Woodless Graphite: These pencils are basically a piece of graphite in the shape of a pencil. There are also some woodless graphite pencils that are encased in a laquer coating rather than wood.

Wooden Pencils: Okay. We all know what a wooden pencil is. It's the yellow one with a pink eraser on top and a number 2 on it. You know, the ones we used to fill in the little circles on our multiple choice tests in school.

Well yes, those are pencils, but a set of good quality drawing pencils comes with a lot more variety than that. All of the pencil types mentioned above come in varying degrees of hardness and are labled with a number and the letter H or B. The pencils labled H are on the hard side and the ones labled with a B are the soft ones. I don't know where the "B" comes from but that's the way it is. Pencils range from 9H (the hardest) to 9B (the softest).

The number 2 pencils we're so familiar with are right in the middle in terms of hardness. They're equivalent to an HB pencil. If you're just starting out drawing or you're just doing some doodling or sketching an HB or #2 will work just fine for you. But, if you want to get a much more interesting drawing you'll have to have some contrast between lights and darks. If all you've ever drawn with before is a number 2 pencil, the way you achieve your darker tones is simply to press down harder.

But there is a better way. That's where the softer pencils come in. After #2 in terms of softness comes B then 2B, 3B ect. all the way up to 9B. Although many artists never use anything softer than a 6B. With a 6B you can get some very dark tones and it's not going to be as soft and thus crumbly as a 9B.
For the harder pencils, I rarely use anything harder than a 2H and that's usually just for the initial line drawing before any shading takes place. Doing the initial line drawing very lightly allows you to erase any mistakes you might have made. Once your line drawing is acurate, it's time to get the softer pencils out and start shading.

So to wrap this up, if you're planning on getting a little more serious with your drawing you'll want to get a set of pencils. There are some sets out there that have just 4 pencils in them. So if you're strapped for cash this is an option. Pencils are also available individually so you can pick and choose whichever number / letter combo you need.

I prefer traditional wooden pencils for my drawings and my brand of choice is Derwent. They make sets of 12 pencils that range from 4H to 6B or from H all the way up to 9B. And, you can get a set of 12 pencils for about $12 - $15 so it's not terribly expensive to get into drawing.

So now go out, get yourself some good pencils, and start drawing....

Categories: Art Tags: Tags: , , , , ,

Landscape Painting Tips For Watercolor Artists

One of the biggest challenges beginners face with any type of art, is the ability to really connect with the creativity that is inside of them. It's difficult in the beginning to just let go and paint from your heart and soul. Your mind is being filled with techniques and systems for approaching painting, which in my opinion, tends to drown out your inner creativity. Learning techniques is essential, but there should be a point where you begin to draw from your own creative imagination.

When painting a subject, whether it is a person or a landscape, it is important to first observe your subject. You have to get close and personal to what you are painting. If you want to learn how to paint great landscapes, then you should spend time near the area that inspires you to paint in the first place. Only then can you really understand how to transfer what it is you see to canvas.

Take a ride out to the area you wish to paint. Bring along some pencils and paper. The best way to become really intimate with the scene is to just spend time there doing some sketches. This will really force you to observe what you see and burn the image and the environment into your senses.

Painting with watercolor on location is quite challenging, especially if you are a beginner. The scene is constantly changing. There are certain techniques in watercolor that require the paper to be at certain angles, or the paper needs to be saturated to a certain degree, etc. To get everything right within such a short time span is quite difficult, which is why you should bring a camera in the event you are not able to capture the scene. Once you find a composition that you like, take a bunch of shots at different distances and angles. When you get back to your studio, you will now have a few reference sketches as well as a bunch of great photos to work with. In the beginning, while painting on location, try to choose compositions that are not overly detailed or complex.

One of the best ways to immerse your self in watercolor landscape painting is to find people with the same passion. Search online for any groups or websites for landscape painters in your area. Start chatting and get to know everyone. Many of the artists in these groups love to connect with other artists and plan painting trips. This is a really great way to gain experience.

You do not need to bring your entire studio with you when painting on location. Many beginners will bring far too many supplies, which becomes more of a nuisance than help. Only bring the colors and supplies that you really need to work on a particular scene.

Remember, things change very quickly outdoors. Lighting conditions and weather can change in a matter of minutes. You must be able to paint quickly without being too sloppy. Block in all of your large areas first then go back and start adding your details.

Many landscape artists usually block in the sky area first. The sky is generally paler than the rest of the painting, which enables you to work from light to dark. The sky area also influences the way you paint the rest of the objects in your painting.

When painting objects in the foreground that require great detail, do not try and paint every single leaf or blade of grass that you see. This will usually create too much detail that will draw focus away from the center of interest in your painting. It is also far too time consuming if you plan on painting on location. Besides, a painting is not meant to be an exact replica of what you see, rather your unique impression of the scene. If you want exact details, you are better off taking a photograph.

Don't be afraid to use your imagination. If you are painting a scene and feel that you should add a few trees here, or a bush there, or a bird on a branch, then by all means go for it.

If you find one particular location appealing, and have already painted there once before, don't hesitate to go back and paint it again, only this time go out on a cloudy day instead. You will be surprised how different a scene can look when the weather changes.

I hope these watercolor painting tips have helped. If you ever find yourself getting discouraged or frustrated by your progress, don't give up. Instead, welcome and learn from your mistakes. It will make you a much better painter.

Categories: Art Tags: Tags: , ,

Keep A Sketchbook And Have Fun

A sketchbook is like a diary for an artist, a place where you can just let out all your art without any worries. Any person who wants to get better at drawing should have a sketchbook, because it not only records your ideas, thoughts and experimentations, but a sketchbook also gets you drawing and drawing, building your skills with every moment. You will see that the quality of your sketchbooks will be better and better, and what at first was dull then will become almost a work of art for itself.

In a sketchbook you can do anything you want, although some artist prefer to have sketchbooks based on themes. For example you could have a sketchbook only in human anatomy, and another just a "test sketchbook" where you try any kind of ideas that comes to your mind. And remember that sometimes is not all drawing on your sketchbook, you can write some ideas too, you thoughts, all this is valuable when years pass and you can have a better perspective of how your art has evolved.

What can you draw? That is up to you, but I know sometimes is hard to just start drawing. And this trivial things often end up taking more time than they are supposed to. Luckily, there are websites and books where you can get some ideas on what you can draw in your sketchbook.

About techniques, don?t hold back. This is personally what I like most about sketchbooks. Since sketchbooks are personal, not meant for the public to view, you can experiment as much as you like. That applies to style, medium, composition. This way you can truly discover what can be done to make your art better. Just go wild would be the better advice.

Consider your first sketchbook as a beginning of a journey, just imagine all the things you will learn on your way, through a road that is full of surprises. Let freedom and creativity be on your sketchbook and have a lot of fun!

Categories: Art Tags: Tags: , , , , ,

Introduction to Pencil Drawing Supplies and Techniques

Drawing is a wonderful art form in itself, but it is also an excellent exercise for other forms of art, like painting for instance. Learning how to draw will truly open your mind to your surroundings enabling you to really see what is before you.

Choosing your drawing supplies

There are a variety of different drawing tools available for today's artists and what you choose to work with is based on your own preference. It comes to down to experimentation. You have to work with a number of different things before you find the tools that fit your style of drawing.

Don't go out and spend a ton of money on your drawing supplies in the beginning. You can really get started with a beginner pencil set and some newsprint paper. When you become more experienced, you can then venture out and spend money on better supplies.

Graphite pencils - Graphite pencils range in hardness and are labeled from 9H to 9B. The H pencils are the hardest. The higher the number in front of the H the lighter the mark. The B pencils are softest. The higher the number in front of the B the darker the mark. The H pencils are generally used for detailed lines where the B pencils will produce rich dark lines great for bold expressive drawings.

Charcoal Pencils - Charcoal pencils also come in a range of hardness and are labeled either from H to B like graphite, or simply as "soft", "medium" or "hard". They have a noticeably different feel to them and produce a rich dark line. Charcoal pencils tend to wear pretty fast because of their softness.

Blending Tortillions - Tightly wound stumps of paper with a point used to blend in your drawings.

Erasers - You may want to have a few different types of erasers on hand to fit every occasion.

Kneaded Eraser - A soft pliable eraser that can be kneaded into any shape to pick up and remove pencil and charcoal. May not be the best for erasing smaller details. The SANFORD Kneaded Rubber Erasers are very popular.

Eraser Pencil - These are wonderful for getting into small areas of your drawings. They can also be sharpened like ordinary pencils.

Fixatives - Fixatives protect your drawings from being smudged or ruined. There are two types of fixatives: permanent and workable. Permanent fixatives are used on a finished drawing to protect, where a workable fixative is used during the drawing process as you are working. Use great care while working with fixatives by only using in a well ventilated area. When spraying the fixative, make sure you do not spray any one section for too long and only spray a light mist standing about 3 feet away from the drawing. You should probably experiment on a few practice drawings first to determine if a fixative is right for you. There appears to be a difference of opinion amongst artists when it comes to fixatives. Some artists love to work with them and swear by them, while others feel they may actually alter the quality of a drawing. Again, you have to experiment yourself to see if fixatives are a good choice for you.

Paper - In the beginning, for the purpose of practice, you may want to consider purchasing some inexpensive newsprint paper. You should be able to get this at any local art store or online. When you are ready to purchase a more expensive grade paper, choose something that will work best with the medium you use. Paper comes in a variety of different textures from smooth to rough, often referred to as its "tooth". A really smooth paper may not work well for some mediums as the surface lacks texture, and will not grab certain drawing mediums very well. If the paper is too rough, the medium may simply slide across the surface. You have to experiment with different papers to find the one you are most comfortable with. Strathmore Brand makes excellent paper that is very popular amongst artists.

Horse Hair Drafting Brush - You should be able to purchase a horse hair drafting brush at any local art supply store or online store. This is a really helpful tool for brushing away unwanted eraser scraps from your drawing.

Basic Drawing Techniques:

There are two basic ways to approach a drawing: linear and tonal. The linear approach to a drawing focuses on line and outlines of shapes. In tonal drawing, you make use of gradations to indicate the various planes of your subject.

You should try to avoid smudging and blending in the beginning so that you force yourself to use your pencil more to achieve value in your drawings.

Avoid looking at your drawing too often. Make sure you are constantly focusing on the subject and only glancing at your drawing. By doing so, you won't constantly judge your drawing, or think something is wrong or out of place. Focus on the subject and draw what you see.

Never throw out any of your drawings. Keep a neat portfolio of everything you draw. This is an excellent way to see your progress over time.

Holding the pencil - Hold your pencil in a way that is most comfortable for you. Some hold the pencil just as you would hold a pen or pencil if you were writing. Others hold a pencil with the pencil between the thumb and index finger, with the rest of the pencil resting under the palm of your hand. Whichever method you use for holding your pencil, make certain that you do not hold the pencil too tightly.

Contour Drawing - This very basic technique is simply drawing the outline of your subject without any shading to indicate form.

Blind Contour Drawing - Similar to contour drawing, only you do not look at the paper. The point of this exercise is to force you to better observe what it is you are drawing. You should have no concern over the outcome of your drawing so it is important not to peek.

Hatching - This drawing technique uses a series of parallel lines drawn close together, in the same direction, which gives the appearance of value.

Crosshatching - Similar to hatching only you draw multiple layers of hatch lines at different angles that overlap one another.

Tonal or Value Drawing - In this approach to drawing we are indicating the various changes of light and shade in our picture without the use of strong edges and lines.

Upside Down Drawing - Drawing upside down is a wonderful exercise to awaken the right side of your brain. When you turn an image upside down, you are making it somewhat abstract and unrecognizable. This forces you to draw what you see as opposed to relying on your memory to draw something.

Negative Drawing Technique - This technique teaches you how to properly see the "white" or "negative" space in your picture. This is the area that surrounds your subject or "positive" space. Instead of drawing out the positive part of the drawing with line, you draw in the shapes that surround the positive part of your drawing.

Dry Wash Technique - This technique works quite well if you want to cover large areas of your drawing. It creates a nice soft tone. You begin by adding marks with a pencil or apply some graphite powder to the desired area on your paper. Then using a tissue or soft cloth pick up some of the graphite and gently rub it across the paper, almost as if you were painting.
Word Count:
1247

Summary:
Drawing is a wonderful art form in itself, but it is also an excellent exercise for other forms of art, like painting for instance. Learning how to draw will truly open your mind to your surroundings enabling you to really see what is before you.

Keywords:
drawing tips,drawing techniques

Article Body:
Drawing is a wonderful art form in itself, but it is also an excellent exercise for other forms of art, like painting for instance. Learning how to draw will truly open your mind to your surroundings enabling you to really see what is before you.

Choosing your drawing supplies

There are a variety of different drawing tools available for today's artists and what you choose to work with is based on your own preference. It comes to down to experimentation. You have to work with a number of different things before you find the tools that fit your style of drawing.

Don't go out and spend a ton of money on your drawing supplies in the beginning. You can really get started with a beginner pencil set and some newsprint paper. When you become more experienced, you can then venture out and spend money on better supplies.

Graphite pencils - Graphite pencils range in hardness and are labeled from 9H to 9B. The H pencils are the hardest. The higher the number in front of the H the lighter the mark. The B pencils are softest. The higher the number in front of the B the darker the mark. The H pencils are generally used for detailed lines where the B pencils will produce rich dark lines great for bold expressive drawings.

Charcoal Pencils - Charcoal pencils also come in a range of hardness and are labeled either from H to B like graphite, or simply as "soft", "medium" or "hard". They have a noticeably different feel to them and produce a rich dark line. Charcoal pencils tend to wear pretty fast because of their softness.

Blending Tortillions - Tightly wound stumps of paper with a point used to blend in your drawings.

Erasers - You may want to have a few different types of erasers on hand to fit every occasion.

Kneaded Eraser - A soft pliable eraser that can be kneaded into any shape to pick up and remove pencil and charcoal. May not be the best for erasing smaller details. The SANFORD Kneaded Rubber Erasers are very popular.

Eraser Pencil - These are wonderful for getting into small areas of your drawings. They can also be sharpened like ordinary pencils.

Fixatives - Fixatives protect your drawings from being smudged or ruined. There are two types of fixatives: permanent and workable. Permanent fixatives are used on a finished drawing to protect, where a workable fixative is used during the drawing process as you are working. Use great care while working with fixatives by only using in a well ventilated area. When spraying the fixative, make sure you do not spray any one section for too long and only spray a light mist standing about 3 feet away from the drawing. You should probably experiment on a few practice drawings first to determine if a fixative is right for you. There appears to be a difference of opinion amongst artists when it comes to fixatives. Some artists love to work with them and swear by them, while others feel they may actually alter the quality of a drawing. Again, you have to experiment yourself to see if fixatives are a good choice for you.

Paper - In the beginning, for the purpose of practice, you may want to consider purchasing some inexpensive newsprint paper. You should be able to get this at any local art store or online. When you are ready to purchase a more expensive grade paper, choose something that will work best with the medium you use. Paper comes in a variety of different textures from smooth to rough, often referred to as its "tooth". A really smooth paper may not work well for some mediums as the surface lacks texture, and will not grab certain drawing mediums very well. If the paper is too rough, the medium may simply slide across the surface. You have to experiment with different papers to find the one you are most comfortable with. Strathmore Brand makes excellent paper that is very popular amongst artists.

Horse Hair Drafting Brush - You should be able to purchase a horse hair drafting brush at any local art supply store or online store. This is a really helpful tool for brushing away unwanted eraser scraps from your drawing.

Basic Drawing Techniques:

There are two basic ways to approach a drawing: linear and tonal. The linear approach to a drawing focuses on line and outlines of shapes. In tonal drawing, you make use of gradations to indicate the various planes of your subject.

You should try to avoid smudging and blending in the beginning so that you force yourself to use your pencil more to achieve value in your drawings.

Avoid looking at your drawing too often. Make sure you are constantly focusing on the subject and only glancing at your drawing. By doing so, you won't constantly judge your drawing, or think something is wrong or out of place. Focus on the subject and draw what you see.

Never throw out any of your drawings. Keep a neat portfolio of everything you draw. This is an excellent way to see your progress over time.

Holding the pencil - Hold your pencil in a way that is most comfortable for you. Some hold the pencil just as you would hold a pen or pencil if you were writing. Others hold a pencil with the pencil between the thumb and index finger, with the rest of the pencil resting under the palm of your hand. Whichever method you use for holding your pencil, make certain that you do not hold the pencil too tightly.

Contour Drawing - This very basic technique is simply drawing the outline of your subject without any shading to indicate form.

Blind Contour Drawing - Similar to contour drawing, only you do not look at the paper. The point of this exercise is to force you to better observe what it is you are drawing. You should have no concern over the outcome of your drawing so it is important not to peek.

Hatching - This drawing technique uses a series of parallel lines drawn close together, in the same direction, which gives the appearance of value.

Crosshatching - Similar to hatching only you draw multiple layers of hatch lines at different angles that overlap one another.

Tonal or Value Drawing - In this approach to drawing we are indicating the various changes of light and shade in our picture without the use of strong edges and lines.

Upside Down Drawing - Drawing upside down is a wonderful exercise to awaken the right side of your brain. When you turn an image upside down, you are making it somewhat abstract and unrecognizable. This forces you to draw what you see as opposed to relying on your memory to draw something.

Negative Drawing Technique - This technique teaches you how to properly see the "white" or "negative" space in your picture. This is the area that surrounds your subject or "positive" space. Instead of drawing out the positive part of the drawing with line, you draw in the shapes that surround the positive part of your drawing.

Dry Wash Technique - This technique works quite well if you want to cover large areas of your drawing. It creates a nice soft tone. You begin by adding marks with a pencil or apply some graphite powder to the desired area on your paper. Then using a tissue or soft cloth pick up some of the graphite and gently rub it across the paper, almost as if you were painting.